 How-to
How to Connect Deck to Patio: Step-by-Step Guide
Table of Contents
- Understanding the Basics of Connecting Deck to Patio
- Building a Deck Over Concrete Patio: Materials and Methods
- Deck Footing Requirements for Safe Installation
- Installing the Ledger Board and Flashing
- Preventing Water Damage at Deck Patio Junction
- Structural Integrity: Joist Hangers, Uplift Resistance, and Lateral Load
- Permits, Building Codes, and Inspections
- Common Mistakes to Avoid
- Frequently Asked Questions
Last Updated: October 4, 2026
Understanding the Basics of Connecting Deck to Patio
Connecting a deck to a patio requires careful planning and precise execution to create a seamless transition while maintaining structural integrity and preventing water damage. The difference between a solid connection and a failed one comes down to understanding the fundamentals.
When you connect deck to patio, you're bridging two different building systems: a static concrete slab and a dynamic wood structure that moves with temperature, moisture, and load. These systems expand and contract at different rates, the core tension you need to solve.
The most common approaches, building over or adjacent to the concrete patio, require different techniques. Building over uses deck blocks or concrete piers; building adjacent relies on ledger board attachment. Your choice determines your material list, labor timeline, and maintenance burden.
Most DIY guides treat the patio-to-deck connection as an afterthought. It's not. This junction experiences more stress, water exposure, and seasonal movement than any other part of your deck.
Building a Deck Over Concrete Patio: Materials and Methods
Building over concrete requires the right materials and understanding of load distribution. You cannot place pressure-treated lumber directly on concrete, concrete wicks moisture upward, and wood absorbs it and rots from the bottom up.
Create an air gap between your deck frame and concrete to prevent direct contact and allow moisture to evaporate.
Deck Blocks vs. Concrete Piers
Deck blocks and concrete piers are the two primary methods for supporting a deck over concrete. The choice between them affects cost, longevity, and installation difficulty.
Deck blocks are pre-cast concrete units that sit directly on the patio without anchoring. They're simple to install but can shift in freeze-thaw cycles and don't provide the lateral load resistance of piers.
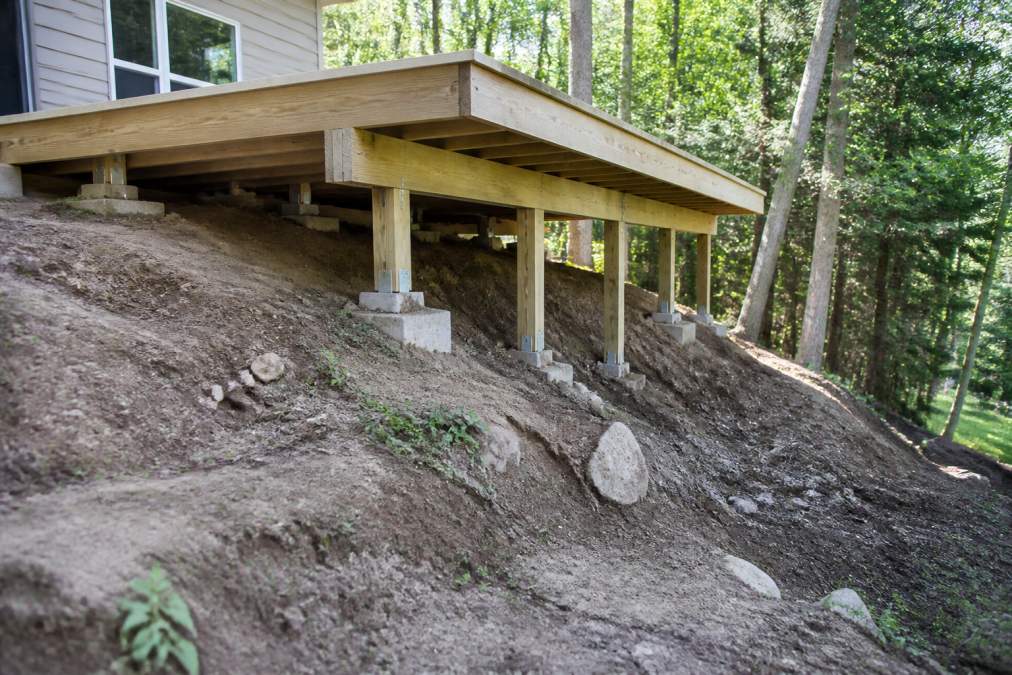
Concrete piers are holes dug below the frost line with posts anchored via bolts. This method provides superior stability and meets building codes but requires digging and knowledge of your local frost line depth.
For most patio-to-deck connections, concrete piers are a strong choice as they resist uplift and lateral movement effectively.
Pressure-Treated Lumber and Corrosion-Resistant Fasteners
All framing lumber touching concrete or exposed to moisture must be pressure-treated. Pressure-treated lumber resists decay and insect damage; standard lumber rots quickly.
Use hot-dipped galvanized or stainless steel fasteners. Regular steel corrodes when exposed to moisture and concrete. Corrosion-resistant fasteners cost more but last the life of the deck.
Joist hangers must also be galvanized or stainless, a corroded hanger fails silently until your deck moves.
Deck Footing Requirements for Safe Installation
Your footing system must support both the dead load of the deck and the live load of people, furniture, and snow.
Frost Line Depth and Pier Placement
The frost line is the depth to which ground freezes in winter. If your footings are above it, freeze-thaw cycles heave them upward, causing your deck to shift and creating gaps at the ledger board.
Your local building department publishes frost line depth for your area. Your footings must extend below this depth, it's code, not a suggestion.
Load-Bearing Calculations and Spacing
Load-bearing calculations determine how much weight your deck can safely support. A typical residential deck must support 40 pounds per square foot of live load. Your local building department has tables and charts to simplify this, tell them your deck dimensions, joist spacing, and beam configuration, and they'll verify code compliance.
When you connect deck to patio using concrete piers, verify that your soil can support the bearing pressure.
Installing the Ledger Board and Flashing
The ledger board is the most critical connection point between your deck and house, it bears half the deck's load and creates a direct pathway for water to enter your home if improperly installed.
Ledger Board Attachment Methods
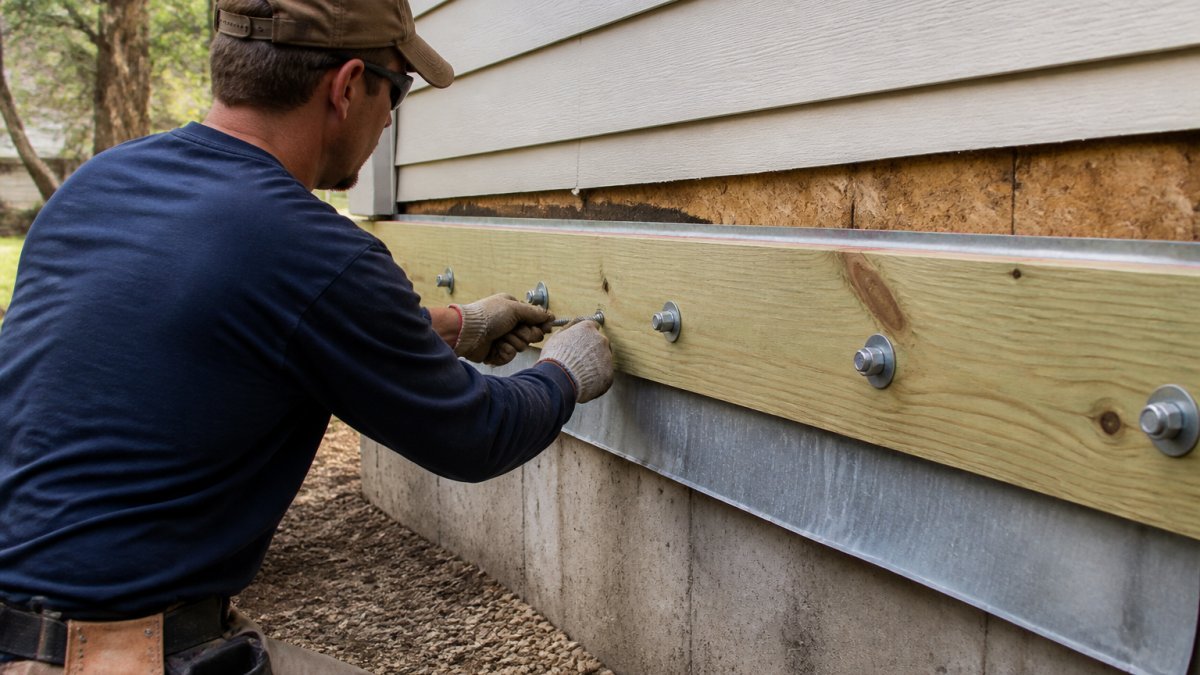
The ledger board must be bolted directly to the house rim joist, never to siding. Remove siding first to expose the rim joist.
Use 1/2-inch galvanized bolts spaced 16 inches apart, passing through the ledger board, rim joist, and house framing.
The connection must resist both downward load and uplift from wind or snow. Your bolt pattern and size determine uplift resistance.
Flashing Installation to Prevent Rot
Flashing is a metal barrier that directs water away from the ledger board. Without it, water soaks the rim joist and causes rot that spreads into your home's framing.
Install flashing above the ledger board, extending at least 4 inches up the house wall and 2 inches out over the ledger board to shed water away from the connection.
Use galvanized or stainless steel flashing. Aluminum corrodes in contact with pressure-treated lumber and accelerates decay.
Seal all gaps between flashing and the house with exterior-grade caulk. Water finds every crack. Caulk prevents it from entering.
Preventing Water Damage at Deck Patio Junction
Moisture causes rot, mold, and structural failure when you connect deck to patio. Your defense involves barriers, drainage, and material selection.
Moisture Barriers and Drainage Slope
The most effective moisture barrier is air space. If water cannot reach wood, it cannot cause rot.
Use deck blocks or piers to create a gap between concrete and your deck frame, allowing air circulation and preventing moisture from wicking upward.
For your deck surface itself, ensure proper drainage slope. Your decking boards should slope slightly away from the house, typically 1/8 inch per foot. This slope prevents water from pooling on the deck surface.
Install a sub-base of landscape fabric or gravel under the deck frame. This layer prevents soil moisture from rising into the framing. It also improves drainage around your footings.
Material Transitions and Waterproofing
The transition between your patio and deck surface requires careful attention. If your patio is concrete and your deck is wood, the two materials expand and contract at different rates.
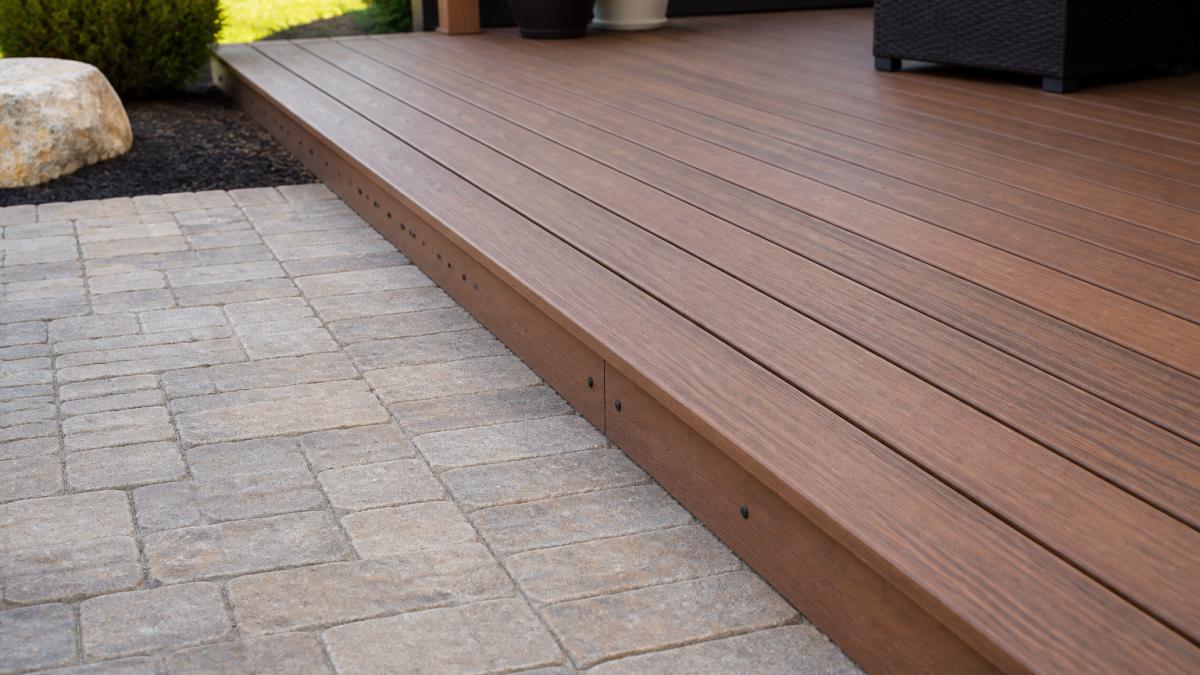
Create a small gap (typically 1/2 inch) between the patio edge and the deck frame. This gap accommodates movement without creating stress. Fill the gap with flexible caulk rather than rigid material.
If you're building a composite or Trex deck, the same principle applies. Composite materials also expand with temperature. The gap prevents buckling and cracking at the transition.
For the ledger board connection, apply a waterproof membrane behind the flashing. This membrane catches any water that gets past the flashing and directs it downward and away from the house. Use a product designed for this purpose, not standard caulk or tar paper.
Structural Integrity: Joist Hangers, Uplift Resistance, and Lateral Load
Your deck must resist three types of forces: downward load from weight, uplift from wind and snow, and lateral load from side-to-side movement.
Joist Hanger Installation and Hardware Selection
Joist hangers connect your deck joists to the ledger board or beam. They transfer the joist load directly to the supporting structure. A properly installed joist hanger is stronger than the joist itself.
Use galvanized or stainless steel joist hangers rated for your joist size. Install the hanger with all fasteners provided, typically 10-16 nails per hanger. Do not substitute fasteners or omit any. Each fastener carries load.
Install hangers on both sides of the ledger board connection. This ensures that your rim joist is fully supported and cannot twist or fail under load.
Resisting Uplift and Lateral Movement
Uplift occurs when wind or snow pushes upward on your deck. Your bolted ledger board connection resists this force. The bolt pattern and spacing determine how much uplift your connection can withstand.
Lateral load is side-to-side movement from wind or seismic activity. Your deck frame resists lateral load through diagonal bracing and the connection between the deck and house.
For most residential decks, the bolted ledger board connection provides sufficient uplift and lateral resistance. However, if you're building a very large deck or live in a high-wind area, consult your building department about additional bracing.
Install rim joist blocking between your ledger board and the first row of deck posts. This blocking prevents the rim joist from twisting and helps distribute lateral loads more evenly.
Permits, Building Codes, and Inspections
Building permits exist to ensure your deck is safe. Skip the permit process, and you risk structural failure, water damage, and liability if someone gets hurt.
Your local building department requires a permit for any deck over 30 inches high or covering more than 200 square feet. Some jurisdictions have lower thresholds. Check with your building department before you start.
The permit process typically involves:
- Submitting plans showing deck dimensions, materials, and footing details
- Paying a permit fee (usually $50-300 depending on deck size)
- Scheduling inspections at key stages: footings, framing, and final inspection
Inspectors verify that your footings are below frost line, your bolts are properly spaced, your flashing is installed correctly, and your overall structure meets code. These inspections catch problems before they become expensive failures.
When you connect deck to patio, the inspector will pay special attention to the ledger board connection and the transition between materials. This is where most code violations occur.
Common Mistakes to Avoid
Learning from other people's failures saves time and money. Here are the mistakes we see most often.
Attaching the ledger board to siding instead of rim joist. Siding cannot support the load. The deck pulls away from the house within a few years. Always expose the rim joist and bolt directly to it.
Skipping flashing or using inadequate flashing. Water gets behind the ledger board and rots the rim joist. This damage spreads into your home's framing.
Placing footings above the frost line. Freeze-thaw cycles heave your posts upward. Your deck shifts, creating gaps at the ledger board. Your deck becomes unsafe. Always dig below frost line.
Using regular steel fasteners instead of galvanized or stainless. Fasteners corrode and lose strength. Your joist hangers fail silently. Your deck becomes unstable.
Building directly on concrete without deck blocks or piers. Wood absorbs moisture from concrete and rots from the bottom up. Use blocks or piers to create an air gap.
Failing to leave a gap between the patio and deck frame. The two materials expand at different rates. Without a gap, you create stress that causes cracking and movement.
Ignoring drainage around the footing area. Water pools around your posts and accelerates rot. Slope the ground away from your footings and use landscape fabric to improve drainage.
Connecting your deck to your patio correctly requires attention to detail and adherence to building codes. The ledger board connection, flashing installation, and footing depth are non-negotiable.
Frequently Asked Questions
Can you build a deck directly over an existing concrete patio?
Yes, you can build a deck over concrete, but the patio must be structurally sound and level. Use deck blocks or shimming materials to create proper spacing and allow for moisture drainage. Avoid fastening directly into concrete unless using appropriate masonry anchors. This method works well for transitioning materials between patio and deck while protecting the concrete underneath.
What are the deck footing requirements for connecting to a patio?
Footings must extend below the frost line (typically 36-48 inches in most regions) to prevent heaving during freeze-thaw cycles. Space footings no more than 16 inches apart for decking joists. Use concrete piers or deck blocks rated for your local soil conditions and load requirements. Proper footing depth and spacing ensure structural integrity and prevent settling over time.
How do you prevent water damage at the junction where a deck meets a patio?
Install metal flashing where the ledger board connects to your house, ensuring it extends over the rim joist and down behind any siding. Create a drainage slope of at least 1/8 inch per foot away from the structure. Use a moisture barrier beneath the deck frame and ensure proper ventilation underneath. These measures protect against rot and water infiltration at the critical patio-to-deck transition.
Do I need a building permit to connect a deck to a patio?
Most jurisdictions require a building permit for deck construction, especially when attaching to your home. Permit requirements vary by location and deck size. Permits ensure your deck meets local building codes for safety, including proper footing depth, ledger board attachment, and structural design. Contact your local building department before starting work to confirm requirements for your specific project.